Butter really is better. And it is a lot of fun to make!
Last week, when I went to the farm, I bought raw milk and I have been using it. I love all the things you can make from it! I just l.o.v.e it!
There are a lot of tutorials out there on how to make butter and believe me, Andy and I have looked at them all!
And here is my conclusion... I am a person that needs a ton of steps and pictures. I need to know EXACTLY what is going to happen and EXACTLY how it going to look.
I thought some of you might be a lot like that also so I decided to show y'all step by step (and picture by picture) just how I made butter.
Here is a couple little housekeeping things about making butter. First, you really should let the cream get to room temperature (I keep forgetting but it works quicker if you let it warm up a bit.). Second, you can use just about anything that will aggitate the cream. I used a Kitchen Aide mixer. Others have used food processors, blenders and in the good ol' days they a churn! :)
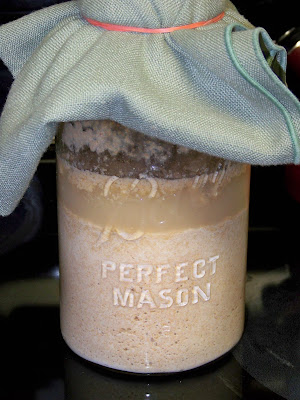
Here is my milk. Do you see the line of where the cream has seperated? Just use the top part. The less milk and more cream, the butter better!
Put the seperated cream in the container of whatever appliance you are using. If you are using a food processor,
Laura says not to fill more than 3/4 full or it doesn't work.
After about 3 minutes, your cream begins to look like whipped cream (what a thought! :)). A tip from my experience, if you are using a mixture, put on the baking shield or your bowl will turn out looking like mine (a mess!). When you are using a mixer, you really have to turn up the speed so it slops everywhere if you don't have the shield on. If you are using a food processor or blender, it needs to go on medium speed.
What I am trying to show here (and it didn't turn out) is that after the "whipped cream" phase, it goes back to looking more liquidy. I was really worried that I did it wrong and after doing the butter more than once, I have seen that for some reason it just does that. (Sounds intelligent, huh?)
After it's back to liquidy phase (after the "whipped cream" phase) it will go back to the whipped cream but it will be a more cream to golden color. Keep whipping!
The butter is starting to seperate from the cream (buttermilk-some say you can use it the same, some say you can't. The jury is still out on that one.)
The butter after it is whipped. The second time I attempted this, there was a lot more butter. I put way too much milky cream in the first time (which is this picture).
The next step is rinsing the butter. Run it under COLD water. Continue to squeeze and rinse until water is completely clear. It is a l.o.n.g process but keep at it. It is so worth it!
and.... Here's my butter. It is soft when you first finish rinsing it but within a couple hours, it will be back to the normal hardness of butter.
I know it sounds like a lot of steps but making butter is really really easy and like I said.. So worth it!
So what do you say? You willing to give making your own butter a try?


